
Marble Magic | Follow these steps for salon quality effects
For an alternate design, try using different colors of Sharpie to create a watercolor effect.
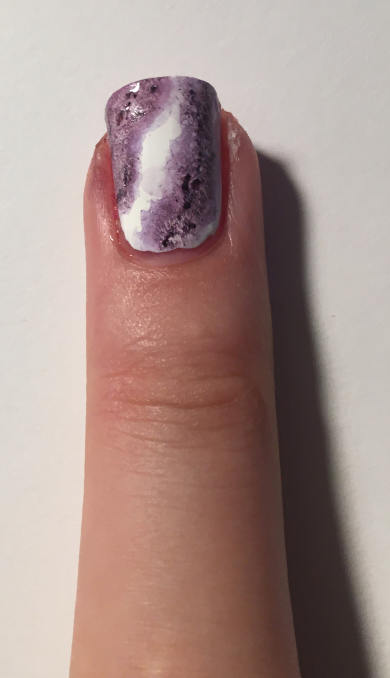
These nails are a classy representation of a shiny marble floor, countertop or pillar, and are easier to do than they look.
The secret weapon to achieving this lovely nail art design is a twin tip black Sharpie. Yep. Plus some rubbing alcohol and acetone nail polish remover.
Keep reading to see how I painted this design on my nails.
Things you’ll need:
Base Coat (Essie Strong Start Base Coat)
White Polish (OPI Alpine Snow)
Top Coat (Seche Vite Dry Fast Top Coat)
Black Twin Tip Sharpie
Rubbing Alcohol (Preferably in a spray bottle)
Small Paint Brush
Plastic Lid or Dish (For Mixing Sharpie Ink)
Acetone Nail Polish Remover
Q-tips (For Cleanup)
Steps to Success:
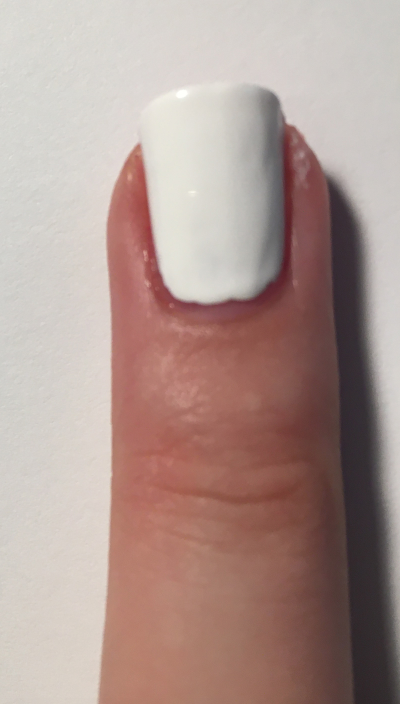
1. Apply your base coat and let dry.
2. Paint all of your nails white and let dry.
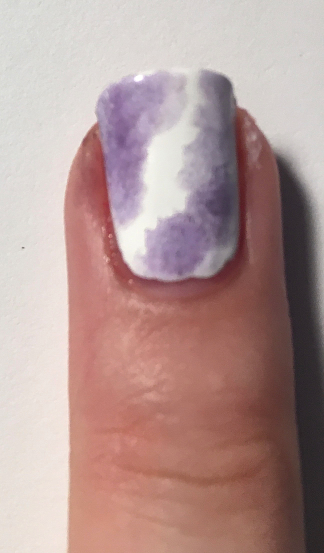
3. On the bottom of the plastic lid or dish, scribble with the fine tip side of the Sharpie.
4. Spritz some rubbing alcohol over the Sharpie ink to make a thin purple watercolor solution. Stir the solution with the small paintbrush.
5. Paint the solution onto different parts of your nails, being sure to leave some of the white polish showing. You can be messy with this.
6. Take the Sharpie with the ultra fine tip and draw squiggly lines in the purple on your nails. Think of a tree branch when drawing these. You can be messy with this, too.
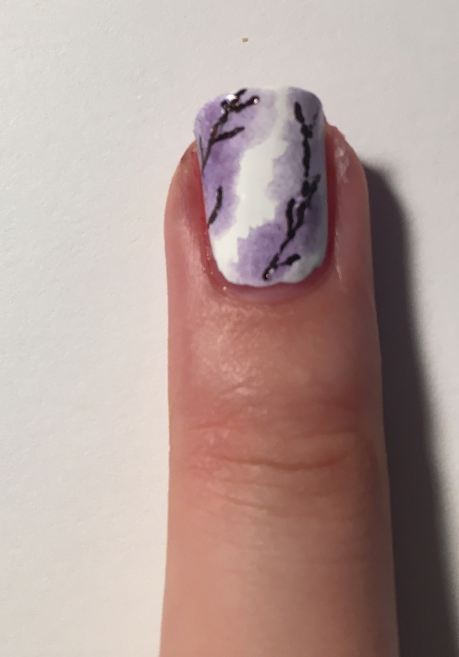
7. Take your small paint brush dipped in acetone nail polish remover and pat the bristles over the black lines. Be extremely careful with this step, as you don’t want to remove the white polish underneath. This should blur the lines and give it the look of marble. Let dry.
8. Apply top coat, let dry and enjoy your purple marble nails!
You may also like...


-

Cedar Bend hosts successful cat yoga event
The Humane Society hosted an event last weekend on Saturday, May 2 for cat yoga at the Outreach and Education Center. There were many participants who showed up for...


You must be logged in to post a comment Login