
Follow these steps to drawing mushrooms
Sketching can be difficult to do and even harder to get good at. One of my favorite things to draw is mushrooms, and I’m going to teach you how to draw them.
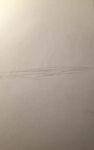 Step 1.) Start at the Base
I like to start with a rough looking line-based floor I make by dragging my pencil across the paper.
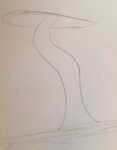
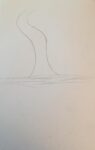 Step 2.) Start the Stem
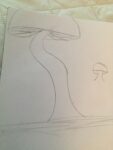
For this step, you will want two lines starting broad at the bottom and getting narrower, then broad again at the top. Make sure they are either parallel or match up. I like to add a few twists and turns.
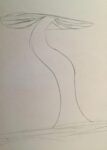 Step 3.) Add the Gills
To continue with your mushroom you need a cap, and at the base of the cap there are gills. I make these by dragging a line across the top of my stem with a bit of an arch and then connect the tips of my gills to my stem, then fill it in with lines extending from the point where the stem meets the cap.
 Step 4.) End With a Cap
For the nice circular shape, you will want to draw a dome from each end of the gills. If your stem is too long, it never hurts to draw off the page.
 Step 5.) Little details
I like to add things to the cap and the stem like little freckles or lines down the stem.
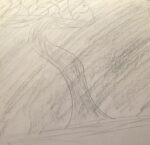 Step 6.) Shading
Shading can be hard. I like to use the flat part of my pencil and lightly cover the whole sketch or take a piece of graphite for a mechanical pencil then crush it up and put it on my wrist or the base of my thumb and brush over the page lightly.
And then you’re done! Keep perfecting it, and soon you can draw giant mushrooms with no effort at all.
You may also like...


-

Cedar Bend hosts successful cat yoga event
The Humane Society hosted an event last weekend on Saturday, May 2 for cat yoga at the Outreach and Education Center. There were many participants who showed up for...


You must be logged in to post a comment Login