
Delicious Design | Cook up some crocheted pastries for Thanksgiving
Myra Steinman Photo
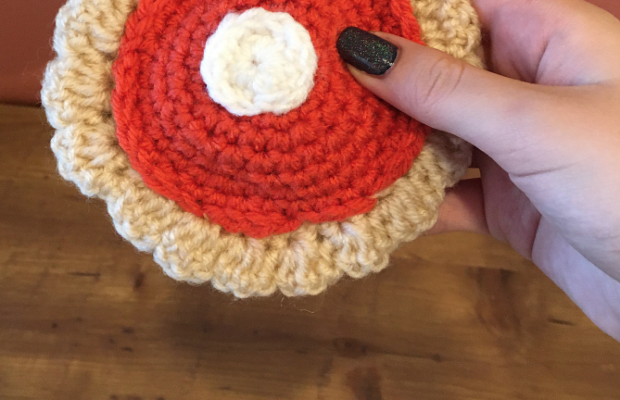
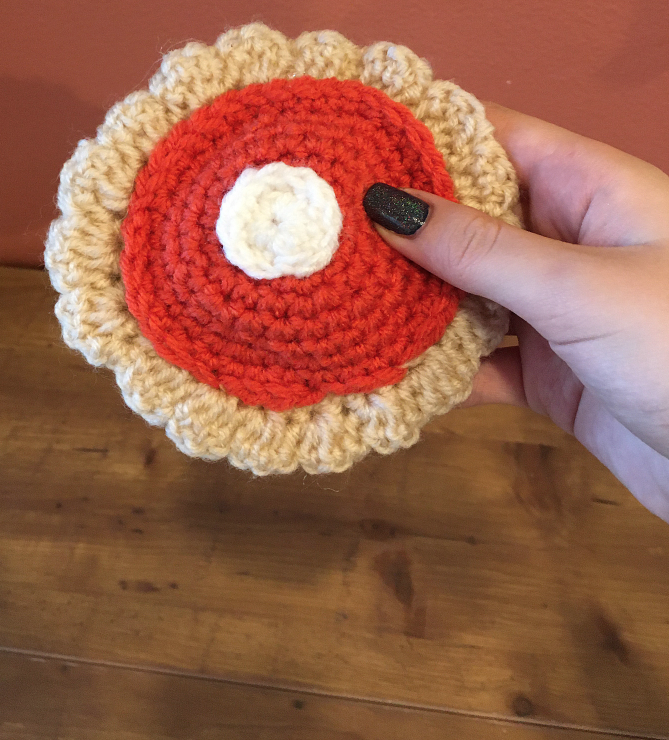
I love pie. (In my opinion it’s better than cake.). I also love to crochet, and Thanksgiving is coming up, so why not crochet a mini amigurumi pumpkin pie?
Amigurumi is the Japanese art of crocheting/knitting stuffed creatures and plushies. This pie can be used as decoration, keychains and play food for children.
Plush Dimensions:
Height: about 1 inch
Pie diameter: about 4.5 inches
Pie tin diameter: about 2.5 inches
Filing diameter: about 3.5 inches
Crust diameter: about 6 inches
Whipped cream diameter: about 1 inch
Things I used:
3.5 mm Crochet Hook
Light Tan Yarn for Crust
Orange Yarn for Filling
White Yarn for Whipped Cream
Stuffing
Stitch Marker (I used a bobby pin.)
Yarn Needle
Aluminum Foil
Small Round Container (I used a small measuring cup.)
Thin Cardboard
Scissors
Hot Glue Gun
Writing Utensil
Terminology
CH (Chain)
ST (Stitch)
SC (Single Crochet)
SC INC (Single Crochet Increase)
DC (Double Crochet)
BLO (Back Loop Only)
SS (Slip Stitch)
Pattern
Crust
R1: 6 sc in magic ring
R2: 6 sc inc around
R3: 1 sc inc, sc repeat around
R4: 1 sc inc, 2 sc repeat around
R5: 1 sc inc, 3 sc repeat around
R6: 1 sc inc, 4 sc repeat around
R7: in blo, sc around
R8: sc around
R9: 3 dc in 1 st, sc, repeat around, join and fasten off.
Pumpkin Filling:
R1: 6 sc in magic ring
R2: 6 sc inc around
R3: 1 sc inc, 1 sc, repeat around
R4: 1 sc inc, 2 sc, repeat around
R5: 1 sc inc, 3 sc, repeat around
R6: 1 sc inc, 4 sc, repeat around
R7: 1 sc inc, 5 sc, repeat around
R8: 1 sc inc, 6 sc, repeat around
R9: 1 sc inc, 7 sc repeat around, join to first stitch and fasten off.
Whipped Cream
(For Pumpkin Pies):
R1: 12 sc in magic ring
R2: sc around, join and fasten off.
Pie Assembly
Pie Tin: Take a long piece of aluminum foil and fold it into thirds. Then mold the square of foil to the bottom of the container. Trim off the excess foil and fold the edges of the foil over to make the “lip” of the pie tin. Take your thin cardboard and trace around the bottom of your container and cut out the circle. Hot glue the cardboard into the bottom of the tin and around the perimeter where the cardboard meets the foil. This will provide some support and keep your pie tin from getting crushed.
Pie Crust: Place it in the tin. If measured properly to the small dish, it should fit. Hot glue the crust to the tin.
Filling: Place stuffing in the crust and place the filling over the top. Sew the edges of the filling to the circumference of the crust with the same color yarn as the crust.
Whipped Cream: Sew the whipped cream to the center of the filling.
Notes
I crocheted in continuous rounds, which means at the end of my round, I didn’t join and put the stitch marker on my first stitch of the next round.
You may also like...


-

Cedar Bend hosts successful cat yoga event
The Humane Society hosted an event last weekend on Saturday, May 2 for cat yoga at the Outreach and Education Center. There were many participants who showed up for...


You must be logged in to post a comment Login